


About this Item:
Here are details about the Solar Light:
- Widely used: This solar lamp can be used on the terrace, the courtyard, or the garden, as it is suitable for multiple scenarios.
- 3 Modes Switching: Mode 1: High brightness with motion sensor, Mode 2: Low brightness with motion sensor, & Mode 3: Continous Light without motion sensor.
- Area Cover: This solar light can illuminate 10-15m².
- Waterproof: It is constructed with IP55, which makes it not only waterproof but also resistant to dirt, dust, oil, and other non-corrosive materials.
- Detection: The sensor can detect movement up to 5 to 8 meters easily.
- Automatic: Auto On / Off feature for efficiency.
Description:
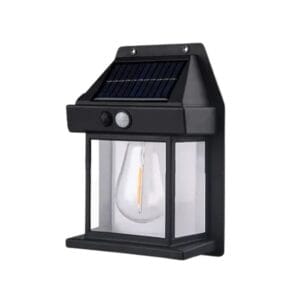
The Solar Interaction Wall Lamp HW 999 is for someone who wants to elevate their outdoor space. If you’re interested in a premium solar light that offers a sleek, modern look while providing top-of-the-line performance, then the Solar HW 999 wall lamp is the one you should put into your cart because…
This solar light lamp is equipped with 3 high-quality bulbs that can illuminate areas of 10 to 15m². Therefore, if you have a large garden or garage, one or two of these lights would glow it up, even in the darkest corners where you need some light.
If you want to know about its durability, then you can rest assured that it is IP55 rated. This means it is not only waterproof but also resistant to dirt, dust, and oil.
And the lamp is easy to use and install. You can read the instructions below on its installation.
This solar lamp is in limited supply. Order now to create a unique ambiance that everyone will admire about your garden before it runs out!

Package includes:
- 1x Solar Light
- 1x Installation accessories
How to Install This Solar Light?
Installing this solar sensor light is a straightforward process. Here are the steps you can follow:
- Choose the Location:
Select a spot that receives direct sunlight for most of the day. This ensures the solar panel can charge efficiently. - Turn On the Lamp:
Make sure to turn it on before installation. To check if it will suit the location. - Mark the Mounting Spot:
Hold the lamp against the wall where you want to install it, and mark the spots for the screws. - Drill Holes:
Use a drill to make holes at the marked spots. - Insert Anchors:
Anchors are provided with the solar lamp and inserted into the drilled holes. This helps secure the screws. - Attach the Lamp:
Align the lamp with the drilled holes and use screws to fix it in place. - Test the Lamp:
Once installed, check if the lamp is working properly. It may take a day to charge fully.
Note:
- Please fully charge the lamp at least a day before using it to ensure a better battery lifetime.
- If the solar panel is exposed to sunlight or other light, the indicator light will not be ON even if the ON/OFF switch is turned on.
- For specifications, please click on the “Additional Information” tab above.


Reviews
There are no reviews yet.